Denon AVR-X1700H Review From A Beginner.
My layman novice cinema guest tested the Denon AVR-X1700H :
So, as luck would have it, when the pandemic started, I suddenly had a lot of extra free time and since I couldn’t really go to the cinema, I decided to dive into the seventh art in the cushy solitude of my home. I didn’t want to become a film critic, I just wanted to explore new fields. My budget wasn’t too large, so I watched the films on my laptop. After two years, my financial situation improved enough to buy a large TV. The quality of the display was notably improved, but the sound from the TV speakers, well, that left something to be desired. A few days ago I asked myself: is this really how I want to watch movies forever? Of course not.
-
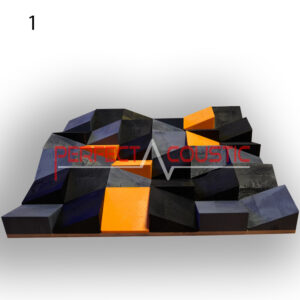
 Art diffusers 60x60x6cm129 € – 168 € +Vat
 -

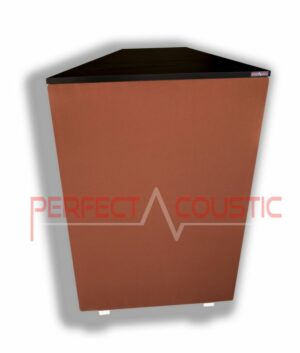
 Corner bass trap with membrane-108x64x23cm135 € – 142 € +Vat


How can we upgrade our film watching experience?
The home cinema space was completely new to me. I confess that I had never watched movies in comparable quality outside of the cinema. Since I already had a TV, I dove into the world of sound systems. I thought price was a secondary consideration. I wanted one that gave cinema-like sound. Could this be where I made my first mistake?
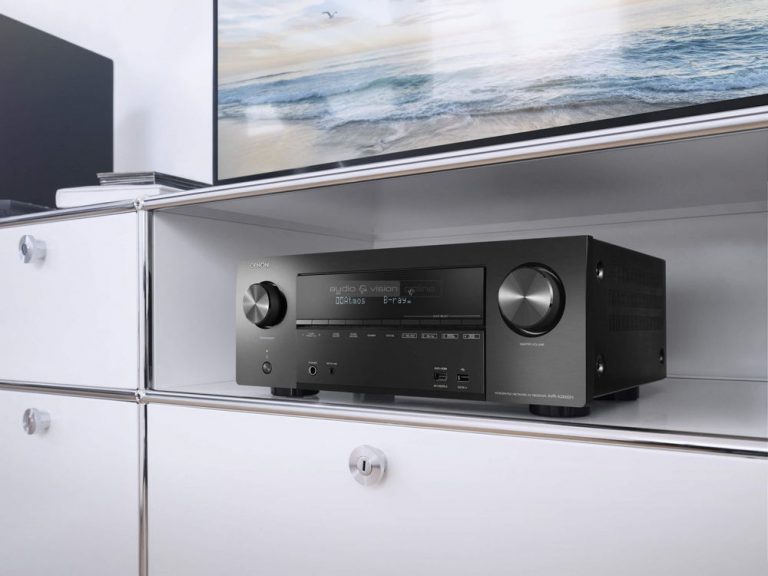
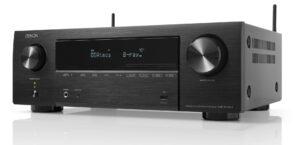
After a few days of research, I settled on the recently released Denon AVR-X1700H home theatre amplifier. I was determined to buy something that offered the latest technology. I was curious to see what the home theatre industry was currently offering the consumer. The goal was to set up a 5.1 system, and I had already purchased the speakers through a friend. I placed the order online and waited, but luckily I was able to take delivery of my fresh and crisp home theatre amplifier the next day.
Unboxing the Denon AVR-X1700H
I had high expectations for the product, as it was not the top of the range but not cheap either… At first sight of the box I raised my eyebrows a bit, as I received the amplifier in a completely ordinary brown cardboard box. The mark on it said “since 1910”. Well, the appeal of the packaging seems to have been preserved from that time… Well, I was under the impression that it’s not the packaging that matters, but the contents.
Unappealing box
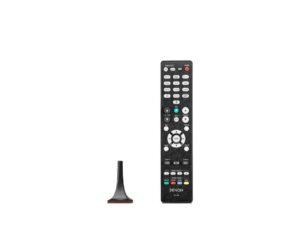
Opening the box, I immediately saw the remote control, the instruction manual and the receiver antenna for the radio. You know, the typical stuff you put aside to get to the main attraction. By the way, the manufacturer is cool, they even provided two pencil batteries for the remote. An interesting idea is the cute stickers that come in the box showing the possible speaker system configurations, which you can stick wherever you like. What is that good for? Don’t ask.
Underneath the stickers there was a paper stand on which we can place the unit’s microphone for sound calibration. I’ll say more about that later, but the stand could really have been plastic or metal. A bit depressing. After digging through the accessories, the only thing left in the packaging was the essential, the home theatre amplifier. I unpacked it and placed it in front of me and kept looking at it. And I looked and looked. For about 10 minutes. Then I wondered, is this minimalist design really the way to go? Maybe it’s just my taste.
-
 Bass sound dampening panels with wood membranes91 € – 268 € +Vat
 -
Absorption panels with diffuser-Two in one62 € – 296 € +Vat

-
Art diffusers 60x60x6cm129 € – 168 € +Vat
-
Corner bass trap with membrane-108x64x23cm135 € – 142 € +Vat
Denon AVR rear panel
The front of the amplifier has a digital panel that acts as a display. I gave it some power and when the subtitles first appeared on it, I felt like I had just travelled back in time 20 years. I last saw these pixelated letters on my Sony VHS tape player. Suddenly, I felt a tug at my heart, because I thought: am I really that old?
The whole front panel is extremely simple in design, with a very large part of it taken up by this digital display, which I really don’t feel like looking at, and a few buttons underneath. I read the labels underneath and none of them really told me much. Maybe one, the radio tuning buttons, but I’m not going to listen to the radio on it. On the two edges are two big, techie buttons, like on classic hi-fi units. The one on the right controls the main volume of course, and the one on the left controls the signal source maybe? At least that’s what you can read underneath. Interesting solution, but that’s where the remote control will be.
Inputs
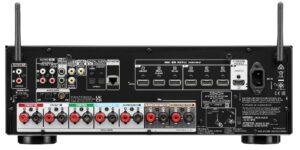
What I appreciated is that there is a USB input on the front, so anyone at the party can quickly put music on it and not have to struggle with the RCA cables on the back, of which there are 2 inputs! It’s interesting that most home theatre amp manufacturers don’t dare to ditch the RCA connectors, which I don’t understand, because no one will hook up a CD player anymore.
When I took a look at the back of the amp, I actually got the gist of it pretty quickly. The bottom of the panel has the outputs for the speakers, and is neatly labelled ‘Front R’, ‘Front L’, ‘Center’, etc. In fact, if you understand the configuration of a 5.1 system, you can plug each speaker into the appropriate output and you’re done. On the plus side, the amp has 6 HDMI inputs, so you can plug in everything from your gaming PC to your old tablet or your grandfather’s 10-year-old laptop. I was a little disappointed, however, because there’s only 1 4K/8K output, which either goes to the TV or, for example, the gaming monitor; the other connectors like optical, coax outputs didn’t mean much to me.
Setting up the device
After admiring the exterior of the amplifier, it was time to connect the TV and speakers. The back proved to be a good feature in this respect, as it was easy to navigate the connections. But, when the TV picked up the signal, it brought back the retro feeling I had when the digital display on the front panel started to show information. Seeing the highly pixelated configuration menu was like installing a new application on my old Windows XP machine. And it wasn’t too hard to recollect the quasi similar Playstation menus either. I shed a tear, but only because I thought again how much I had paid for the product.
The helper shows you some tips on how to set up your speakers, and then does a bit of promotion for its own sound technology, the Audyssey MultEQ XT software, which is supposed to calibrate the speakers to the room characteristics. The microphone that came in the package is for that purpose, by the way. The slogan is: in 15 minutes the system will sound the way it should! Well, I tried this feature later, but I have to shoot the joke, I didn’t hear any difference.
After the tips, the device automatically connects to the wifi network and the fun begins. Oh no, because another retro menu pops up with a bunch more things to set up. HDMI format, HDMI upscaling, screen saver, 4K/8K signal format, HDCP configuration, TV format. I have to admit, I’m completely lost on these. I gave up after a while, all I had in mind was to put in a movie and finally let me enjoy home cinema.
Denon for films and the features

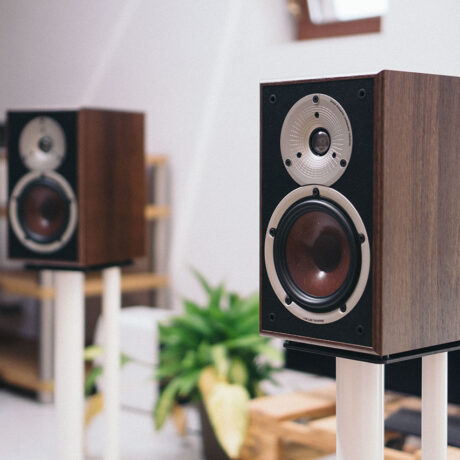
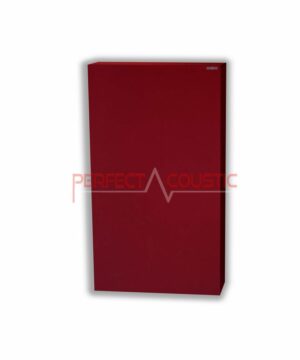
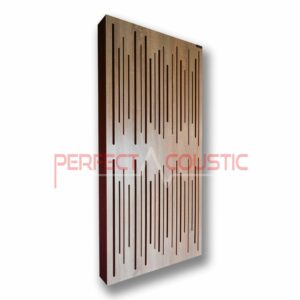
I had high expectations for the sound because I knew I had bought good speakers, so the spotlight was on the amplifier. The product description had all the “buzzwords” that are supposed to impress customers – Dolby Atmos, DTS:X, Dolby Atmos Height Virtualization, 4K, 8K, HDR10, HDR10+, Dolby Vision, Hybrid Log Gamma and more. I put in my favourite movie and started watching. The feeling that captured me would be described as “okay”. But that was it. Nothing extra, “nothing special”. It works. To be honest, I expected a bit more. I calibrated the microphone in my room, turned on all the cool features, as my TV is compatible with them. I’ve read a lot about acoustics, so I tried to set up and furnish my room properly. I put an acoustic carpet on the floor, an acoustic curtain on the window and even bought a partition door curtain for the door. A total of 6pcs of acoustic panels adorn the walls of the room , which I bought from Perfect Acoustic. After that the test could begin.
-
 Bass acoustic wall panels with double leather membrane83 € – 260 € +Vat
 -
 3D acoustic diffuser 70x70x10cm122 € – 139 € +Vat


It was not a bad cinematic experience, but not quite what I expected.

At the end of the day, I found myself not knowing where to put the product. Too expensive for a home theatre amplifier. I realised that I had made the wrong decision, not because the product was so bad, but because the price/value ratio was not right for my purposes. It has 3 HDMI inputs capable of 120 Hz refresh rate in 4K quality or 60 Hz refresh rate in 8K quality. This home theatre amp is more like a platform where you plug in the latest Xbox, gaming PC, and TV and it all plugs into the same TV with the latest technologies. But it’s too expensive to use just for your home theatre.
Doomsday:
All in all, the Denon AVR-X1700H is a very expensive device that is only worth buying if it is used for all the purposes that the manufacturer made available. It’s a bit pricey for a simple home theatre amplifier, and many of its features remain unused. In the end, I can judge the sound quality to be average despite all the cool tech, and the retro configuration interface plus the digital display didn’t improve the situation much. I have a feeling that it won’t have a long life with me.
G.H.